Solving Side Window Scratching
We determined that the pilot side window was getting scratched by the thin sheet metal side panel that sits between the pilot-side window plastic and the pilot-side interior upholstery. This was checked by applying strips of masking or duct tape to the inside surface of the plastic window and running the window up & down. Examining where the scratches show up on the tape will give a good idea of what is hitting the plastic and scratching it.
I found, by unlacing the back of the bench seat and looking down, that the original side panel had a big scalloped bite cut out of its lower rear corner, and it appeared that the edges of that were what was scratching the window plastic. I got a replacement for the side panel from Vern Gregory's "Ercoupe Bone Yard."
The parts catalogue calls them Skin Assembly -Fuselage Inner on page 10, figure 10 part number 30.
Univair lists them currently (Nov. 2010) with a hefty price tag:
415-31035 ERCOUPE INNER SKIN $226.67
If you look between the
top edge of your side window, and the interior upholstery panel, you
will just see the top edge of the side panel. To access it for replacement
, first remove the bench seat cushion, and unlace the bench seat
back covering:

Then, remove the interior pilot-side upholstery panel (that appears in the upper right part of the photo above).
Go behind the bench seat back and unscrew the 2 or 3 screws holding the front edges of the side panels of the baggage compartment, and the top ones if necessary. You are trying to get enough clearance to get your hand behind the bolt that holds the bench seat back in position; it is located at the top corner of the bench seat back. You want to be able to get a hand or tool in enough to loosen the nut behind that bolt, and remove the bolt.

Once you have the interior side upholstery panel removed, and the
bench seat back loosened enough to pivot it forward a bit, you should
be able to access the side panel that covers the window
plastic.
(Alternatively, you can take out the whole seat frame by loosening the two screws that hold it to the main section and by unscrewing the seat belt loops. The whole frame comes out with the seat pan attached and this makes working there much easier. - The Editor)
You will find that -- oddly -- the trim wire casing runs through a channel along the top edge of that sheet metal panel! So, next you have to disconnect your trim wire from its lever at its front end. Straighten the end of the trim wire, being careful not to metal fatigue it, if possible. But do NOT remove the wire from its spiral casing! Instead, spray lube liberally inside the channel in the top of the sheet metal panel, through which the trim wire casing runs, and pull the whole spiral *casing* out from the rear of that channel (being careful not to remove the trim wire from its spiral casing).

Unscrew all along the front flange. The back flange is harder to access, but if you have unbolted the bench seat back at its top corners, it is possible to get tools in there. We also found it helpful to unscrew part of the triangle shape support piece that shows in the photo above, to get at all the screws in the back flange.
In this case, we were now able to pull out the side panel by pulling up on it, once the front & back flanges were unscrewed. We slid the replacement sheet metal piece in the same way, and reattached it along both front and rear flanges.
However, we found that the bottom edge of the sheet metal piece was flexing, and still rubbing/scratching the window plastic!
Eventually, we discovered the cause: there is also one small screw hole along the bottom edge (bottom flange) of the thin sheet metal piece! It is meant to mate up with another hole at the end of another flange that is underneath the bench seat pan! Because this was a replacement sheet metal piece, the 2 holes didn't quite mate up precisely, so it was necessary to hold the correct spots together with a vise grip, while holding the seat pan up, and re-drill a new mating hole in the bottom flange of the sheet metal piece, right next to where the original tiny screw hole was. This took 2 people.

It will be easier to insert a screw and nut before releasing the vise grips if possible. Once the two pieces are solidly attached, this holds the bottom edge of the thin sheet metal piece in a more "inboard" position, and keeps it away from the window plastic, so -- voila: it no longer scratches the window plastic!
My thanks to A&P/IA Jess Constantini, who worked with me to solve this mystery of the scratched side window.
Linda Abrams N3437H ("Sky Sprite") 1946 415-C
Addition
The side panels on my plane had small tabs on the bottom. These tabs are fastened to the lower seat frame. It is an awkward position - hard to get to. One tab had it's hole ripped out and the other side was cracked. I replaced both tabs with sheet metal. When fastening to the seat frame, pull the side panel toward the frame as much as you can. The picture below shows the side panels with the seat frame removed.

Hartmut
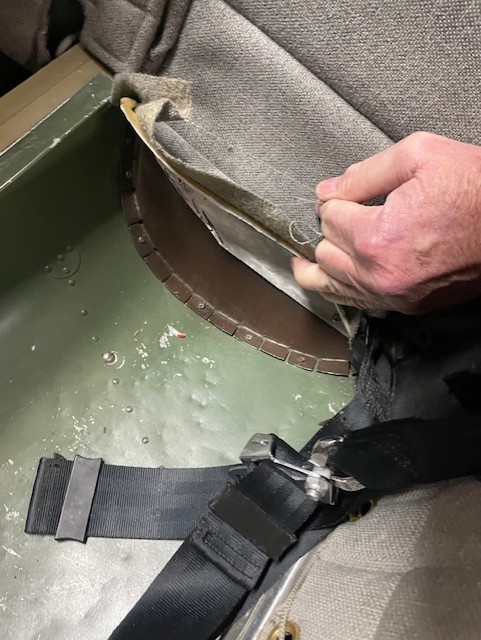
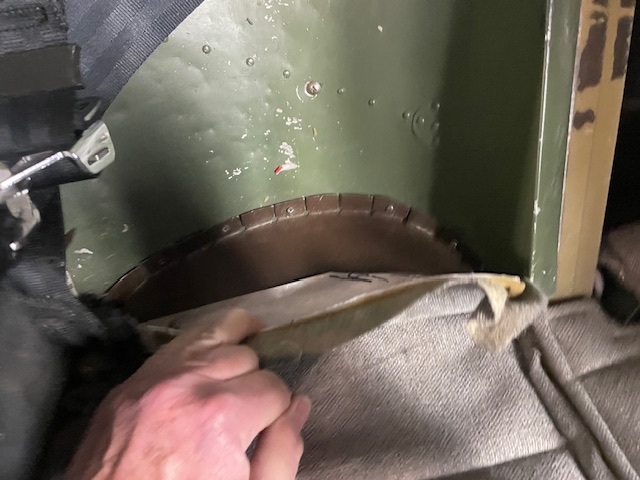
Another solution by Joe
We fabricated the brown aluminum piece. Attached it to the sidewall aluminum. Then to the Seat pan. This pulls the sidewall inwards and prevents contact with the windows. These window are five years old and have no scratches.