
Overhaul Ercoupe Brake Master Cylinder Scott Model 4350

Instructions
1. Remove cover snap ring and disassemble completely. Clean all parts with a good cleaning solvent (don't use gasoline).
2. Inspect cylinder wall, piston rod, and O-ring and lock ring grooves for .any sharp edges, nicks, or scratches. These may be polished out with fine (250 or 400) waterproof sandpaper. Pay particular attention to the cylinder wall, to the rod of the piston assembly, and to the top of that rod (to ensure it won't nick the ref-il 0-ring in the annular groove of the cover on re-assembly). Lubricate all parts, especially 0-rings, with hydraulic oil and re-assemble. Use MIL-H-5606A (Aviation Red) hydraulic fluid.
3. Brake system may be bled by gravity or by pressure. Pressures is preferable (but never exceed 10 psi), for by bleeding from the brake housing, air and fluid are forced up thru the master cylinder into the reservoir in the direction the air tends to travel naturally. Refer to your Aircraft Service Manual.
4. Mounting hardware is as follows: Replace as necessary. Top: AN393-17 Clevis Pin,(alternates AN23-12 j3olt, AN3 10-3 Nut) AN960-1OL Washer & AN380-2-2 Key. Lower: AN3-23 Bolt, AN31O-3 Nut, AN960-l0L Washer & AN380-2-2 Key. Scott 4008 Clevis fork
The Cylinder is best overhauled on the work bench. Taking it apart is easy, after removal of the snap ring all parts will literally jump into your hands.

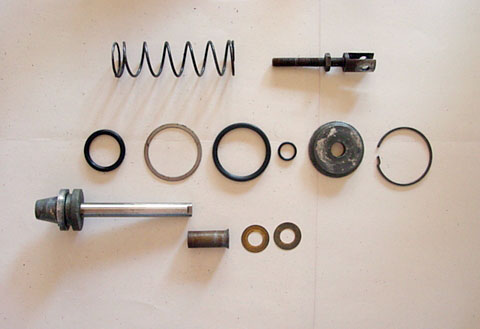
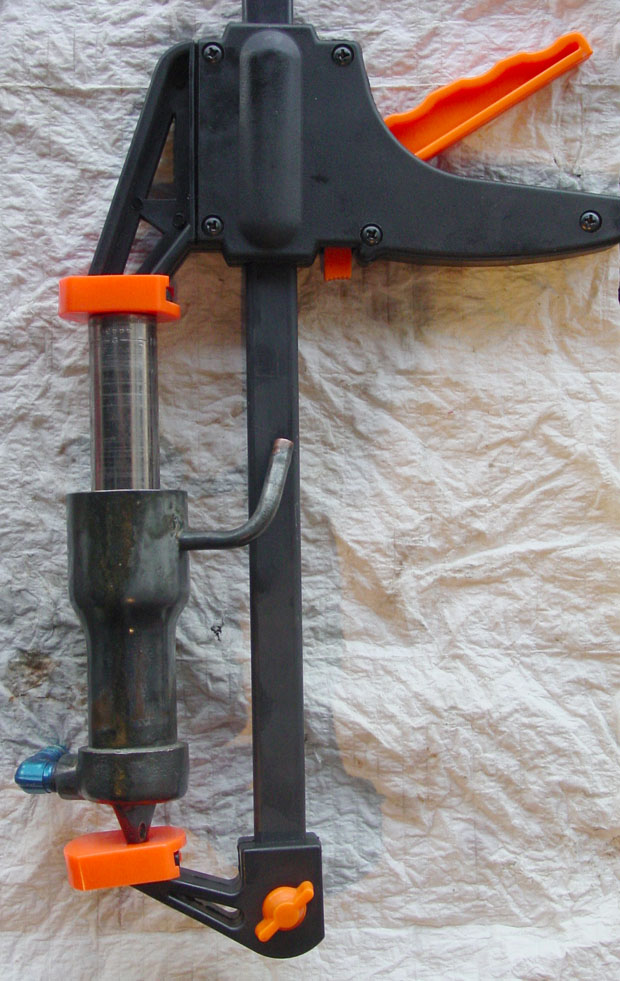
Assemble with new O-rings. The smallest O-ring in the cap rides on the brake shaft. The biggest O-ring seals the cap and is when new hard to compress. Use a long socket or pipe that fits over the brake shaft and compress with a clamp as much as needed to fit the snap ring.
Ronald Wright
Addition observed by Linda:
Carefully check the reservoir cover at overhaul. These aluminum covers can corrode, making a perfect seal impossible. If the master cylinder still weeps after replacing all O-rings, chances are the reservoir cover is pitted from corrosion or nicked or otherwise compromised.