
Late Model Alon Exhausts on an Ercoupe Model 415
I bought my Ercoupe 415C in 1989 and have been dissatisfied with the original exhaust system on many occasions. Aside from the cracks in the pipes and the muffler, I could never get the pipes to fit into the muffler very well. Retightening the muffler clamps literally became a preflight item. I switched to Walker MegaClamps and that helped a lot but the leaks, while reduced, persisted.
During the extensive repairs and modifications we have done on my airplane over the last two years my A&P IA expressed displeasure over the exhaust installation and suggested I look into duplicating the Alon A-2/Mooney exhaust system. He had just bought an Ercoupe 415 that had very extensive modifications and liked the Alon type exhaust system. Contact with Vern confirmed that he had a set in good condition, so I drove up to SC and bought the set from him.
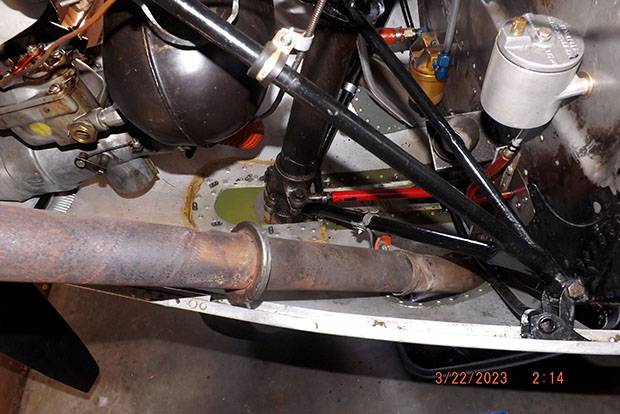
The Alon A-2 style exhausts, also used on the Mooney versions, features two stainless steel exhaust pipes that bolt to the engine in the usual matter. But instead of turning inward to connect to a muffler as the Ercoupe pipes do, the Alon exhausts proceed on through holes in the lower cowling and exhaust directly into the airstream. The Right exhaust has a heat muff that supplies hot air for carb heat and the Left exhaust has a muff that provides heated air for cabin heat.
While the Alon exhaust bolted right on the engine it became obvious that removing the new exhausts would require the nosebowl be at least loosened if not removed entirely. The next problem was the modifications required for the lower cowl. Aside from the holes that had to be cut in the lower cowl, the fact that it is a one piece component on my airplane meant that special provisions were required to be able to get the cowl back on as well. I considered converting the cowl into a two piece assembly but instead decided to cut a slot forward of the nosegear so to enable me to slide the cowl over the exhausts from the front, slip the exhausts through the holes in the cowl, and then pull it forward to secure it. So I cut the new forward slot and reinforced it on the inside along the sides and front with a piece of .032 aluminum sheet, also employing some polyurethane adhesive between the two sheets and along the edges to ensure that oil and dirt did not get inside as it did on the original one.
Figuring out where to cut the holes in the lower cowl proved to be simple. The lower cowl, in two halves, was off my friend’s airplane and it was easy to use it as a template to mark the required holes in my cowl using a Sharpie marker. Then a little work with a Dremal tool cut off wheel created the holes. While the holes in my friend’s lower cowl did not have edge reinforcement, since I needed to patch the semicircle where the old exhaust stuck through the cowl I installed reinforcements inside. I used No 5 flush rivets for that task; while they are overkill for that application, I have found they are the only rivets I can install using my rivet squeezer that always seem to look great.
An unexpected problem was the impact of the new exhausts on the fuel system. Once the exhausts were installed it became obvious that attaching the gascolator directly to the NAS3 carburetor would result in it almost touching the Left exhaust. That was unacceptable to me. The only way to move the gascolator away, back toward the carburetor was to use some shorter brass fittings that were not aircraft standard; that was unacceptable to my A&P. Fortunately, the removal of the muffler left a place on the firewall where the gascolator could be mounted and the Alon fuel system duplicated. I procured a firewall mount for the Steve’s gascolator and a new insulated armored fuel line so the fuel line routing instructions in Alon Service Bulletin No. 12 could be complied with.
The Alons used various approaches to reducing vibration in the exhausts and finally settled on clamps that attach rubber straps between the exhausts and the lower engine mount just before they exit the lower cowling. Univair’s Kit SK-64 provides the parts for one exhaust stack; you will need two kits, but ordering the parts individually probably will be cheaper if you already have the standard bolts, nuts, and washers. By the way, the smaller clamp, the AN755-12, is very hard to install on the engine mount and you may have to resort to standard Adel clamps.
The Alon exhaust installation weighs 2.5 lb lighter than the original and eliminates the muffler leak problems, keeps heat away from the firewall and sounds no louder than the original.

Wayne