
How to refurbish sliding side windows (All 415 Type)
Side windows use sheets of Lexan or Plexiglas with a 0.060 inches thickness. To get the window out: find the cover of the small opening on top of the arched metal frame (front or rear). Remove cover.
Through the opening and the cut in the webbing slide one side of the window carefully out.

With one side out, the window will easily come out of the opposite track when pulled far enough.
Drill out the rivets and use the old sheet as template to drill the holes in the new sheet. For Lexan you can use regular drill bits, for Plexiglas special drills are recommended.
Drill the holes slightly bigger than needed, to avoid tension when assembling. It is best to rivet the window back together, but small stainless screws have also been used satisfactorily. Use type AN470A4-5 soft rivets, not the more common "AD" structural rivets.
 The exact size measurements for the side windows for a " c" model:
 19-3/4" (+-1/32") x 31-3/16" with a 1/8" radius on all corners
Hartmut
Replacing the window welts
Replacing the widow welts in your Ercoupe/Aircoupe is a labor intensive and messy job. If you are short on patience or ability to control your temper it is a job best left for someone who has had the experience of previously replacing them.
The job can be done without removing the seat back and baggage compartment (canvass) but it is much easier to replace the welts when these items have been removed from your "Coupe" Either way, it is recommended that you have a place where you can work on the job out of the weather and be able to leave the airplane in a partially assembled state for a couple of days.
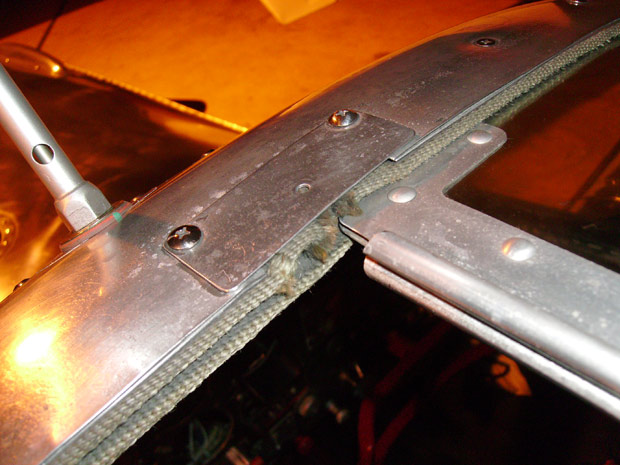
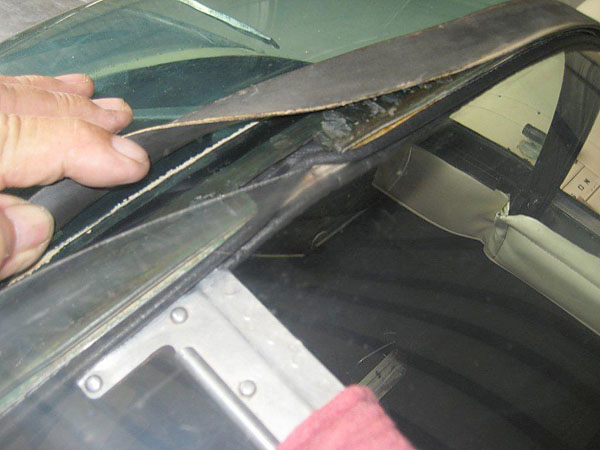
After you have the Coupe properly bedded down, the first thing is to remove the sliding windows and sunshade (if present). If your Coupe has the original straight windshield, remove the small plate at the top rear of the window opening. Starting with either window or the sunshade, force a corner of the aluminum end piece out of the welt by prying the welting back out of the track at the top of the channel where you removed the plate.
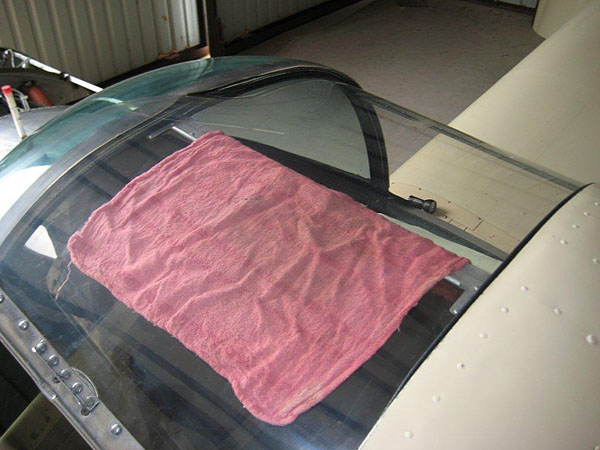
Slide the window/sunshade on out of the track by pulling it carefully forward. As you move it forward, keeping the rear edge of the window/sunshade out of the welt it will become easier to move and eventually you will have it completely out of the tracks. Repeat this process for the other window.
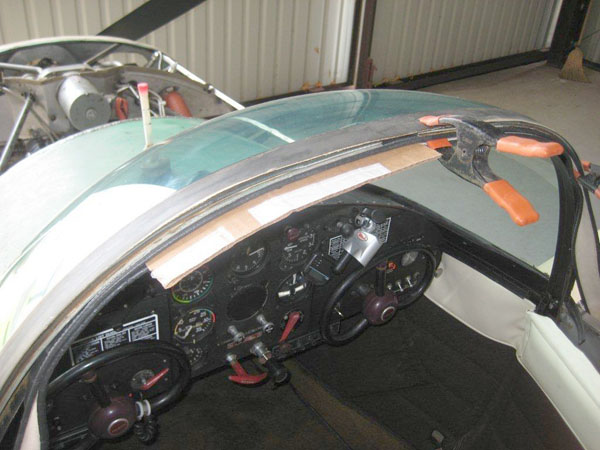
If your Coupe has the bubble windshield, remove the strap at the rear of the windshield that goes over the top of the Coupe and holds the windshield in place. It is not necessary to remove the windshield. You should now be able to see an area where the front window track has been cut out at the top of the track. Using the same process as described above, remove the windows/sunshade from the tracks.
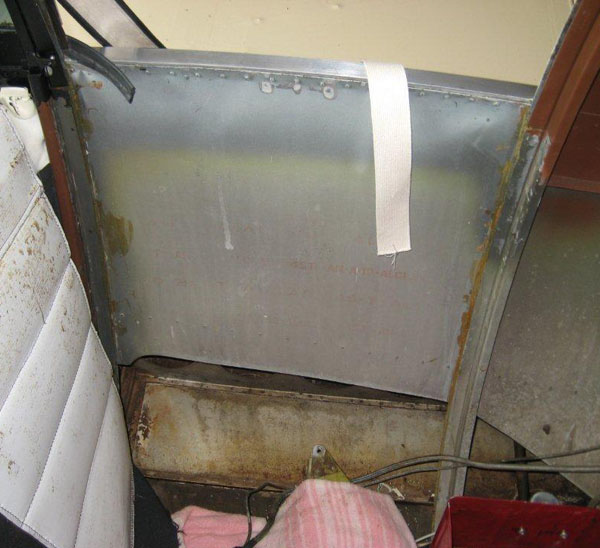
If you plan to remove the seat/baggage compartment, now is the time to remove them. First remove the seat bottom cushions. The seat frame is held in place by several screws. There should be four holding the seat bottom in place, two in the front on the spar cap, and two down in the bottom of the seat pan where it rests on the diagonal rib assembly.
There should also be six holding the seat back in position. One in each bottom corner, which hold the seat back and inner fuselage skin piece together, one in each diagonal rib assembly (on the bottom of the seat back) and one at each top rear holding the back to Frame E.
The screws on the seat back bottom can be accessed by folding the seat bottom up. Once you have the screws out, you can remove the entire seat frame as one unit (after removing the fasteners holding the baggage compartment to the seat back) by folding the seat bottom up towards the seat back. ( It helps to have someone assisting as one of you can be working on each side to get it pulled up and out of the fuselage).
Now you must remove the inner fuselage skin pieces. They are held in place with #4 sheet metal screws (I do not remember how many, but at least 4 per side, maybe six), screwed through the sides into the fuselage frames. Once these are removed, you will have full access to the window channels and welts. If you have upholstery on the side panels you may have to remove or loosen a portion of it to access the sheet metal screws. One of the most difficult tasks is to remove all the old glue/adhesive in the channels. (The old welts will pull out rather easily once you get them started.)
If you are going to replace the welts without removing the seat, pull the old welts out of the channels and clean out all of the old adhesive in the channels. You do not need to remove the upholstery, just unsnap the baggage compartment (after opening the zipper in the bottom) and you will be able to see the bottom rear of the channel. Remove the seat bottom, and raise the seat bottom support and you can see the forward channel bottom.
Once you have all the old adhesive removed from the channels you are ready to put in the new welts. Review the instructions as to which side (felt) goes where. Mark the approximate center of the welt (chalk works OK) and lay them out (working them to remove the tendency to curl). If you are going to use a spray adhesive I would recommend taping paper on the outside and the inside of the window tracks to protect your upholstery and paint.
Work on one side of a welt at a time by placing the adhesive in the track from the top down. Do not put much (if any) adhesive in the portion of the tracks between the window sill and where you can access the tracks at the bottom. (This way if you need to replace the welts again you will not have to remove the seats) Work the welt into the track starting at the top and place heavy cardboard pieces in the welt to hold it in position. If you are working with the seat back/frame in position you will need something to attach the welt to in order to get it placed in the proper position in the channel.
I use a 3 foot long 1/8 inch thick by 1 & 1/2 inch wide stick to attach the new welt to. ( A thumb tack works well) After placing some glue in the channel, run the welt down to the bottom and use the stick to work it into the channel from the window opening to the bottom. Of course, it helps to have glued the top of the welt in the channel first. then remove the thumb tack and wood strip. (A piece of two by four ripped on your table saw works well if you have no knots in the wood)
Of course, it is easier to replace the welts if you remove the entire seat structure and the panels covering the side windows.
After you have everything in position and held in place with the cardboard strips. Let it all sit for a couple of days to allow the adhesive to dry and the welts to conform to their new home.
Oh yes, I recommend using several strips of heavy cardboard cut into about one foot strips 2 inches wide. Once you have a welt in place with fresh adhesive, place the strips along its entire (as much as you can reach) length and let it sit at least overnight and preferably a day or two to let the glue dry completely. This will make your reinstallation of the windows much easier. Also, I recommend putting some talcum powder inside the welts prior to putting the windows back in the welts/channels.
After the installation has set up, you are ready to reverse your process and put everything back together.
Lynn Nelsen